

Unleash Your Inner Dev: Get Linux Power on Windows with Scoop & MSYS2 (No VM Required!)
Unlocking Linux Power on Windows: A Practical Guide to Scoop & MSYS2


Table of contents
Introduction
Feeling constrained by the Windows environment for development projects? Yearning for the flexibility and power of Linux tools? Missing your beloved terminal multiplexer tmux in windows? Need a simple & efficient command line package manager to rule all your devtools? You're not alone. This comprehensive guide unveils the solution: Scoop & MSYS2. No more clunky VMs, no more compatibility issues.
This blog will guide you through a seamless setup process in minutes and equip you with the knowledge to harness most of the Linux utilities directly on your Windows machine & turbocharge your development workflow.
Get ready to unleash the full potential of your Windows machine – the Linux way.
So, let's get started!!!

Setting up scoop
What is scoop?
Scoop is a command-line installer for Windows. But a little bit different than winget or chocolatey in terms of package installation and management.
If you are familiar with chocolatey the below comparison will provide an insight over how scoop is different than other cli package managers.

Benefits of scoop over chocolatey
Chocolatey requires an effort to install. Package managers like Chocolatey require administrator privileges to install an app somewhere like Program Files, whereas Scoop Eliminates permission popup windows by directly installing the target application.
Chocolatey installs apps in the
program filesorprogram files(x86)directory , yourAppDataprofile on your computer, or somewhere similar. Scoop downloads and manages packages in a portable way, keeping them isolated in~\scoop. It won't install files outside its home.
While this usually doesn’t present issues, having things installed in places on your computer that are modifiable by you, the system, and other installers can — at times — cause conflicts.
How to install Scoop ?
Step 1: Open powershell Core or windows powershell as a non-admin instance.
Step 2: Run Set-ExecutionPolicy -ExecutionPolicy RemoteSigned -Scope CurrentUser
Step 3: Run this command - irmget.scoop.sh| iex
Step 4: add this path - C:\Users\<user>\scoop\shims to the environment variables.
Step 5: restart your PC.
Lets try installing some apps with scoop. Lets goooo - 🚀
Run -
scoop install neofetch
You can see you didn't need administrative privilege to complete the installation.
To install some apps not available in your main bucket, you would need to add the bucket where the package is present.
Suppose you need to install lazygit(which is not present in the main bucket. It's in the extras bucket) in your system.
Add the extras bucket with -
scoop add bucket extras
Next, run -
scoop install lazygit
to install lazygit.
You can also install Linux native apps like - vim, neovim, ripgrep, bat, fd, sed, emacs, hwinfo, gedit, kate, gimp, even alacritty & fzf also and many more.
Now you maybe thinking I have written something about buckets. What are these buckets actually? Let's know this.
What are Buckets in scoop?
Scoop packages exist as a part of Git repositories, called buckets containing JSON files which describe how to install a package. In more simple words, buckets are collection of apps.
Scoop has a main bucket which is bundled with Scoop and this is always available as the primary source for installing apps.
By default, when you run scoop install <app>, it looks in the main bucket, but it's possible to install from other buckets too.
The buckets I currently have in my system -
main

extras

nerd-fonts
The buckets that are well-known(you can add them to scoop with just the bucket name. No need to specify the source URL). -
main, extras, versions, nirsoft, sysinternals, php, nerd-fonts, nonportable, java, games
You can see this output(print the buckets well-known to scoop) by running the command shown below in your powershell -
scoop bucket known
Discovering Packages
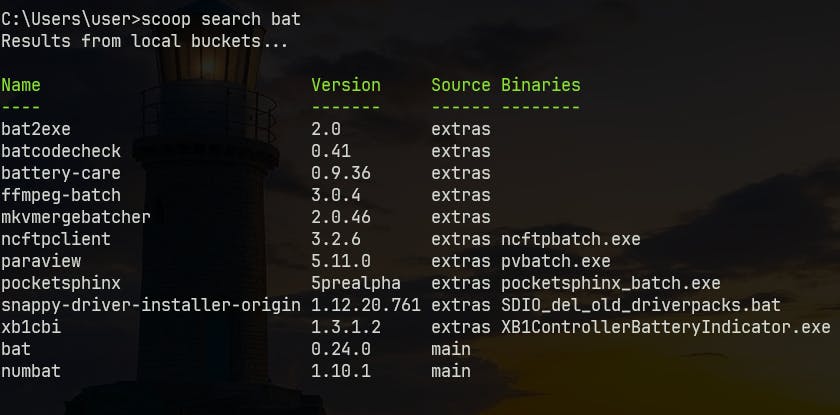
For searching packages in buckets -
Just simply run -
Scoop search <app>
replace the <app> with the app name you want to search if it is present in any bucket. NOTE : This can give multiple outputs based the search it has done by matching the text you have provided in place of <app>.
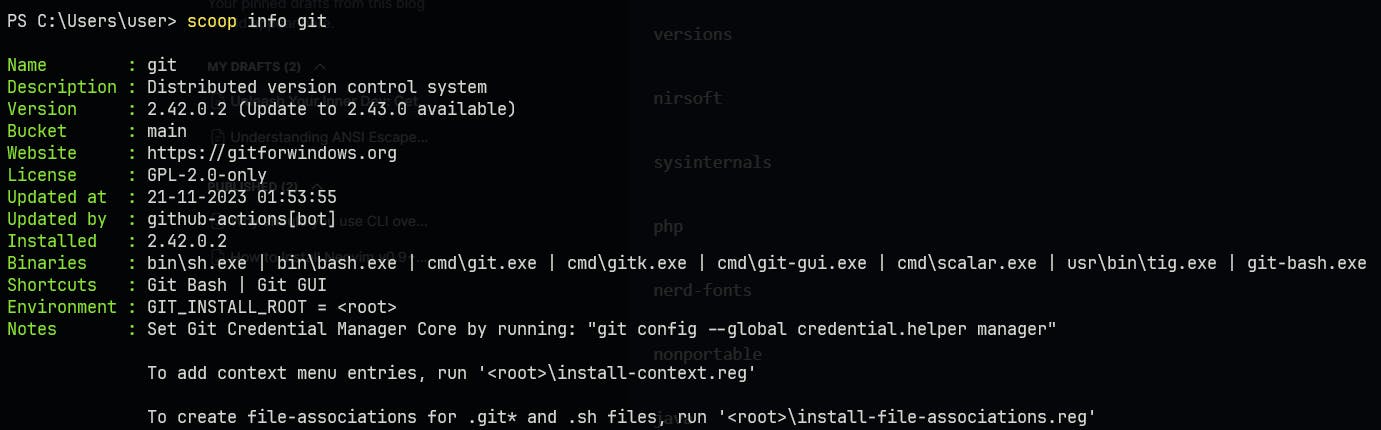
to get concise info about a specific package (you already know the name of the package), use command - scoop info <app>
Uninstalling
Run the below command to uninstall an app -
scoop uninstall <app>
Now you are almost done with scoop.
But before we head towards MSYS2, you should know a little bit more about scoop- especially how scoop installation works under the hood.
Scoop App Installation in a Nutshell:
No native installer: You directly download a compressed package, not a traditional installer.
Isolated installation: Apps are installed in your user directory, not system-wide, avoiding conflicts and bloatware.
Shim magic: A "shim" acts as a shortcut, pointing to the app's location, making it accessible from anywhere.
Safe removal: Delete the entire Scoop directory, and your system remains untouched.
Benefits:
Cleaner system, no leftovers or bloatware.
Easy management: install, update, remove with simple commands.
Rollback-friendly: version control allows reverting to previous versions.
Setting up MSYS2
![]()
What is MSYS2?
MSYS2 stands for "Minimal System 2". It's a collection of tools and libraries aimed at making development easier on Windows by -
Providing a Unix-like environment: This means you can use familiar command-line tools like Bash, Git, and more, just like on Linux or macOS.
Includes build tools: It has compilers and libraries needed to build and run native Windows software.
Not a virtual machine: Unlike WSL (Windows Subsystem for Linux), MSYS2 doesn't require a full Linux environment, making it lighter and faster.
Open-source and modular: Free to use and customize with a wide range of available packages.
How is it useful?
Develop software in a familiar Unix-like environment on Windows.
Build and test projects without needing a Linux machine.
Access command-line tools not readily available on Windows.
Why even install this software? Aren't we getting all that we need with scoop?
How the role of MSYS is different than scoop?
MSYS is a command shell substitute.
The goal of MSYS is to provide a POSIX scripting environment.Scoop is an installer.
The goal of Scoop is to let you use Unix-y programs in a normal Windows environment. As it happens, a lot of the programs that Scoop installs either come directly from the MinGW/MSYS project, or were built using their tools. Scoop can only hope to achieve its goals because of 15 years of amazing work on MinGW/MSYS.
- According to scoop
so there exist softwares, which can only be collected via MSYS, because the tools are not readily available for an windows environment.
In case you would like to see more comparisons -
MSYS2 vs WSL
Building Windows apps? Choose MSYS2
It offers a Linux-like environment for native development, avoiding the complexities of cross-compilation in WSL.
But if you prefer classic Linux tools or target Linux servers - Choose WSL
The full Linux environment that WSL provides, integrates seamlessly with Windows. But it can be heavier.
Installation
Click on this link to install the MSYS2 Setup wizard.
Run the installer. Leave everything as default and click next.
After the installation is complete, a terminal emulator for the UCRT64 environment will launch.
pacman -S mingw-w64-ucrt-x86_64-gccRun the command above to install mingw-w64 GCC to start compiling projects.
gcc --versionthe above command should output -
gcc.exe (Rev4, Built by MSYS2 project) 13.2.0 Copyright (C) 2023 Free Software Foundation, Inc. This is free software; see the source for copying conditions. There is NO warranty; not even for MERCHANTABILITY or FITNESS FOR A PARTICULAR PURPOSE.
NOTE : If you want to access gcc from anywhere in any cmd, powershell or other windows terminal instances add
C:\msys64\mingw64\binto environment variables. Now after a restart, you should be able to develop, run & debug C/C++ applications right inside vscode in windows without any compatibility issues.
Next Steps
$ cat /etc/os-release
Run the above command in an MSYS2 instance to see the output shown below. /etc/os-release is the file containing essential metadata of the operating system running MSYS2.
NAME=MSYS2
ID=msys2
PRETTY_NAME="MSYS2"
ID_LIKE="cygwin arch"
HOME_URL="msys2.org" BUG_REPORT_URL="github.com/msys2/MSYS2-packages/issues"
from the value of ID_LIKE, you can see MSYS2 is derived from both a modified version of cygwin & Arch Linux. That's how it provides a port of pacman to manage (install, remove and update) binary packages and also to build those packages in the first place. This port of pacman will provide you up-to-date native builds for GCC, mingw-w64, CPython, CMake, Meson, OpenSSL, FFmpeg, Rust, Ruby, just to name a few.
Let's see some other examples of getting softwares via MSYS2 & using them directly.
Examples
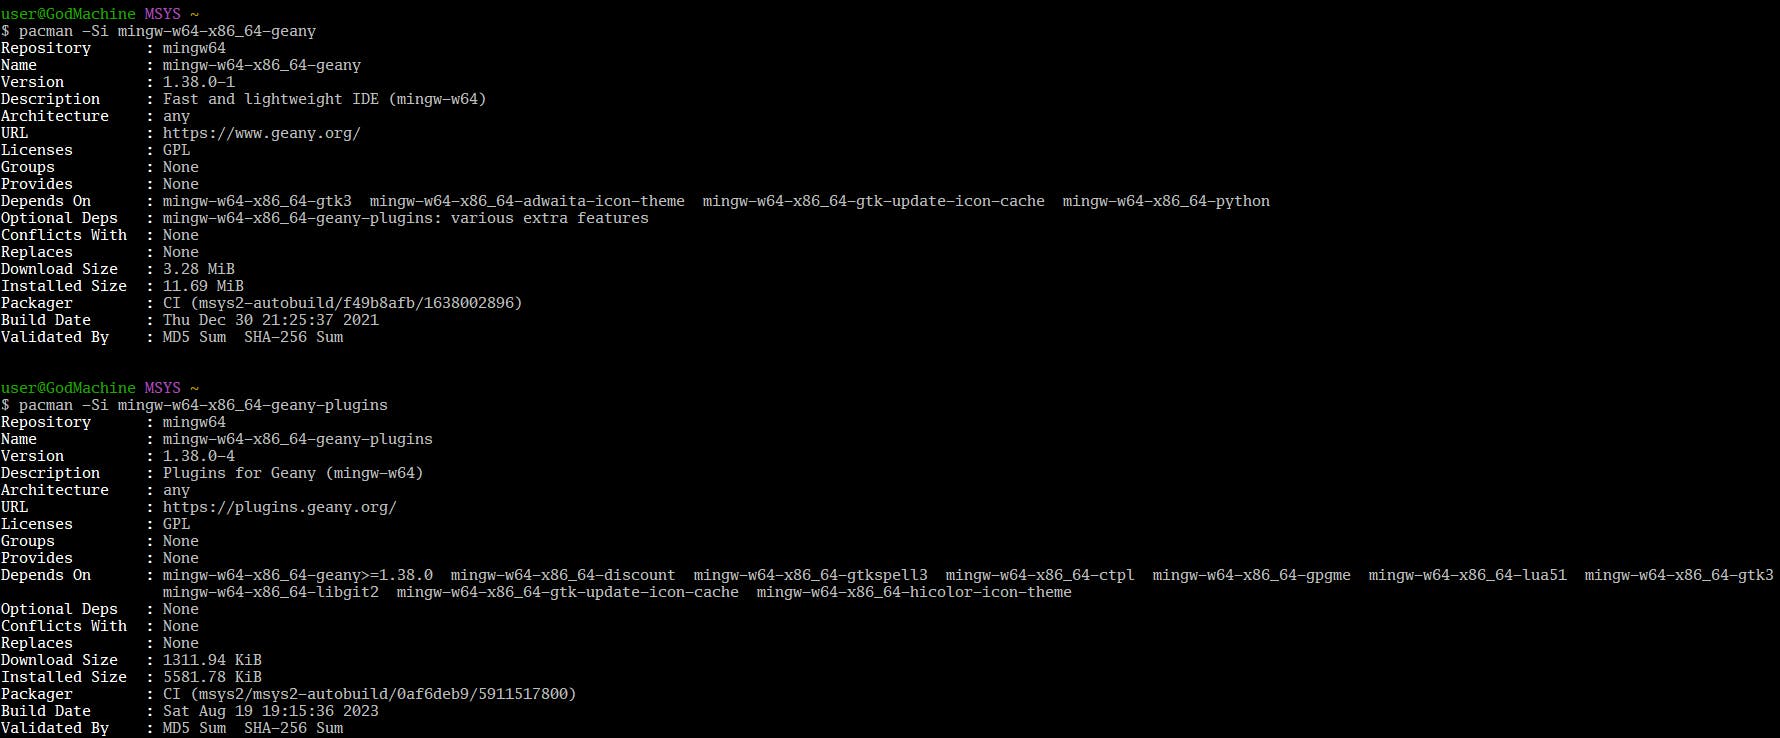
Although geany is available in a scoop bucket, let's try to install it with pacman. search the app among repositories with the command -
pacman -Ss geany

we've got a variety of results. But remember, as we've installed the mingw-w64-x86_64-gcc C-compiler, we should install the the ones only from the mingw64/ repository. otherwise they won't work 😅.
before installation you can take a look at some info about the app by the command -
pacman -Si mingw-w64-x86_64-geany
Now let's proceed towards installation.
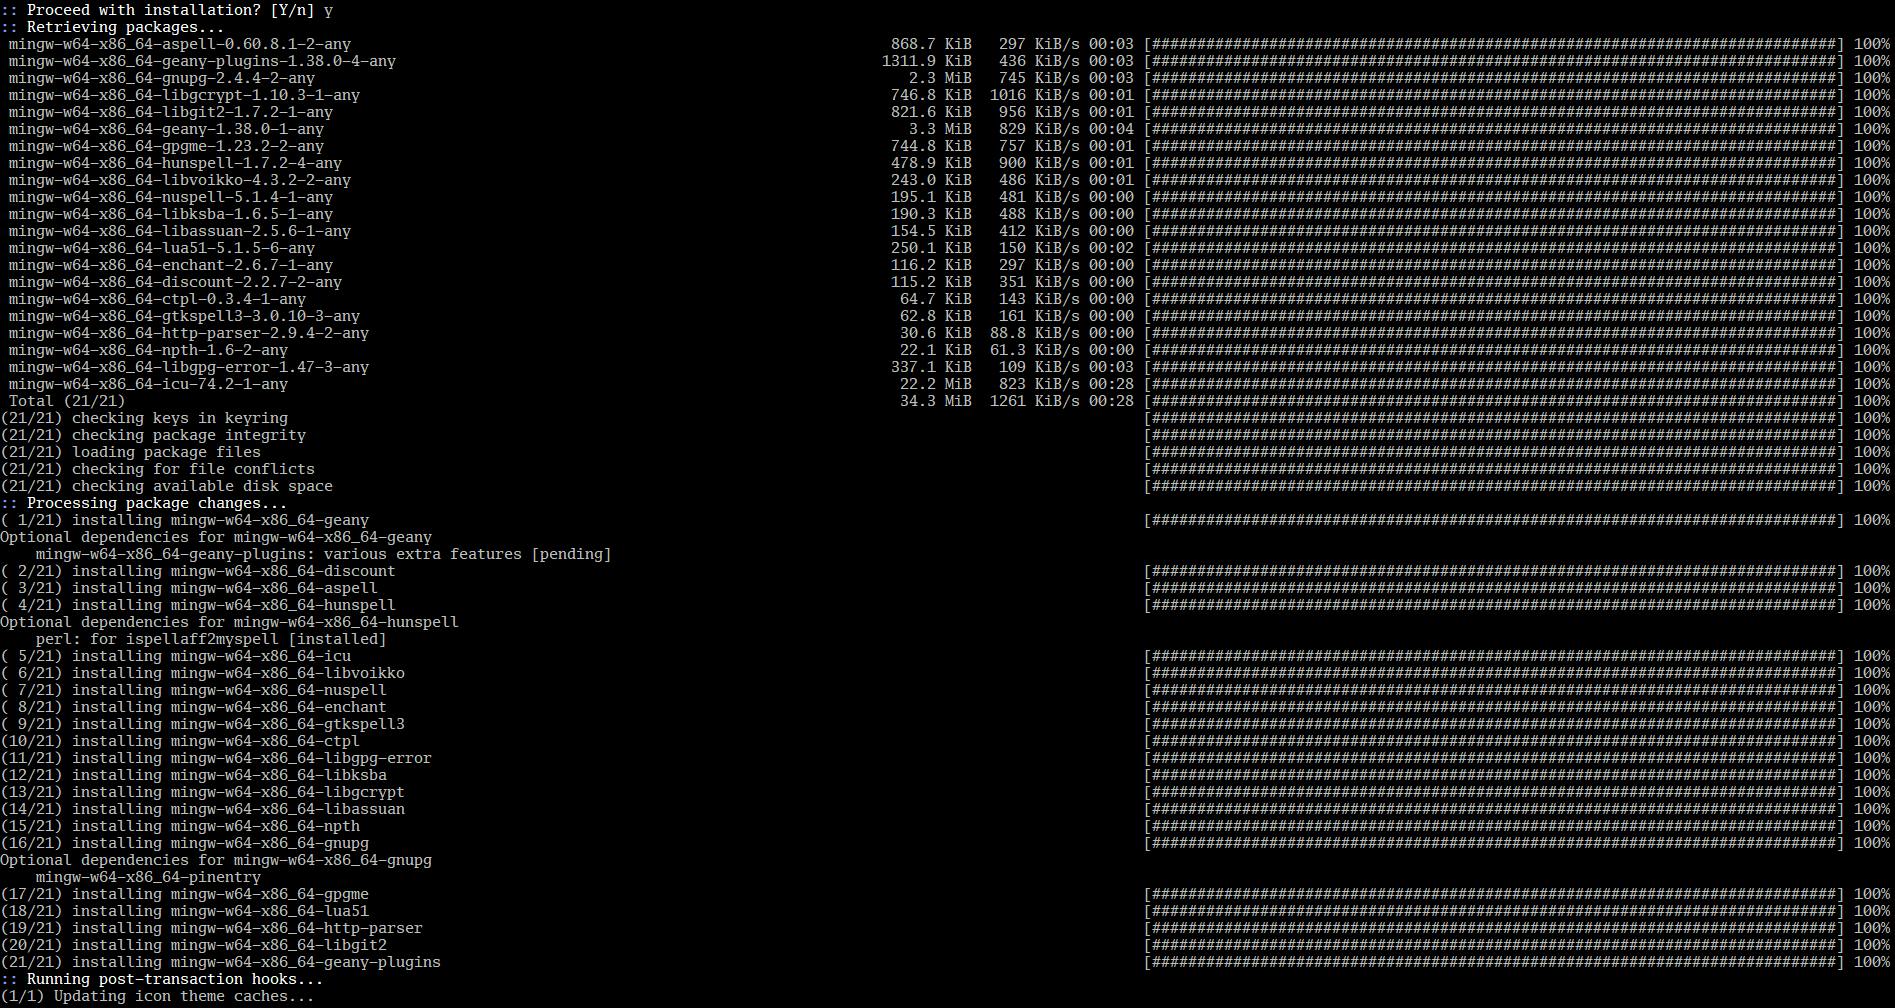
pacman -S mingw-w64-x86_64-geany mingw-w64-x86_64-geany-plugins

press y
After installation add the path to geany ( in my case - it's C:\msys64\mingw64\bin\geany.exe ) to environment variables. Now you should be able to open geany from windows**search bar! Yay! 🚀
This is how you install & get access to gui apps via MSYS2.
Bonus (Using tmux on windows)
Although you are ready now to get started with scoop & MSYS2, for managing and building apps/packages. Let's help you realise how to use tmux from the command line in windows.
For those who don't know - tmux is more than just an open-source terminal multiplexer for Unix based operating systems. It's a swiss-army knife for terminal based productivity.
If you search the app tmux in scoop, we will get no results. It means, now you're confirmed that tmux is not readily available for an windows environment.
Okay, no problem! We've MSYS2. Open an msys2 terminal emulator instance (or, head over to any existing instance, if any). Run -
pacman -S tmux
After installation - if you run tmux, you'll see it's working. To exit with killing the tmux session, enter Ctrl+D.
Now you must be thinking if we can run tmux directly from the command prompt or powershell from now. The answer is NO! Even if you add the path C:\msys64\usr\bin\ to environment variables, when you will run tmux in any terminal profile of windows terminal, an error will be raised.... -

Why is this happening?
Because, the terminal emulator you're using - CMD, cmder or something associated with windows terminal, has not full tty (teletype) emulation support. Putty terminal, mintty terminal (comes with MSYS2, the bash shell in MSYS2 runs on Mintty) supports full tty emulation. Go to the stackoverflow page for more info. Link below 👇
The truth is - to be able to use tmux, you have to run mintty. There's no way you can have this utility in a "windows terminal". I have created a taskbar shortcut for mintty because it is more convenient.
So, that's all of it!
Conclusion
Congratulations! You've explored the power of Scoop and MSYS2, learned key installation concepts, and even conquered tmux in Windows. Now, it's your turn to dive in and start building amazing things! Share your experiences, and join the vibrant community of developers who embrace these tools.
Remember, Scoop offers isolated installations and effortless management, while MSYS2 provides a Unix-like environment and native Windows development tools.
Don't wait any longer - unleash the full potential of your Windows machine - the Linux way!
Please like 💖 & share 🤝 my blog if you found it useful....

Happy Coding!